Scriptcs IntelliSense in Visual Studio Code
We’ve lately rewritten our build systems at work using scriptcs. Scripts with C# as the language with full access to the rest of .Net. Aka PowerShell as it should have been. This rewrite has been awesome for several reasons:
- Ease of use: Since we’re a C# shop, writing the build system in scriptcs is both convenient and time saving. I still remember TFS 2012 XAML based builds with dread.
- Flexibility: The build system is build server agnostic, the same script can be used on Team City, TFS, locally or on any other server
- Ownership: The build system is now so trivial that every team can easily understand and extend the system when needed. The build system becomes part of the product, not something the other guys do.
- Server or local? Same, same: The same scripts are used locally and on the server. The previous XAML based builds were an opaque mess.
IntelliSense
I write these scripts using Visual Studio Code. It utilises OmniSharp behind the scenes to give us awesome IntelliSense. However, for scriptcs this does not work out of the box:
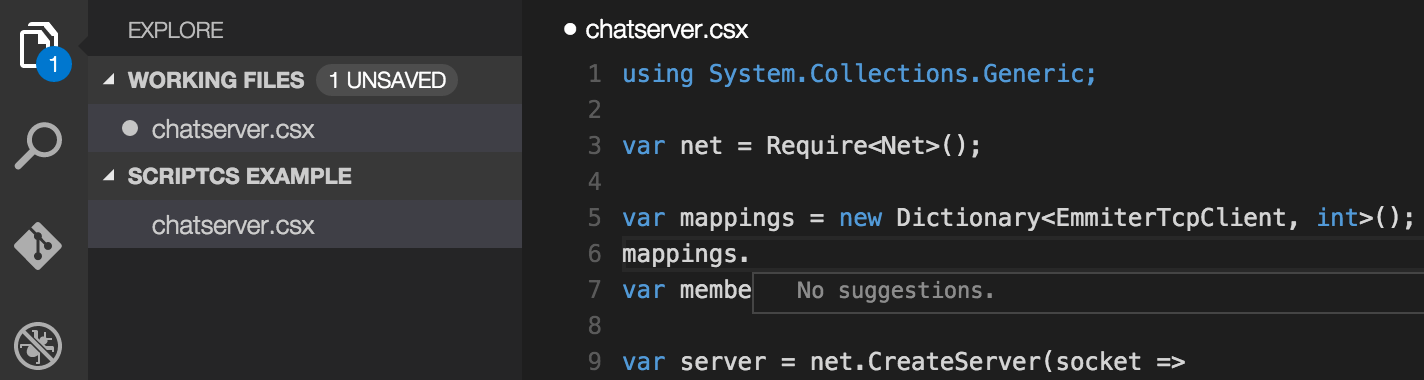
Consider the screenshot above where I’ve opened a folder with a single scriptcs-file. I get autocomplete help, but only with the phrases I’ve previously written in this script. Not the full IntelliSense goodness.
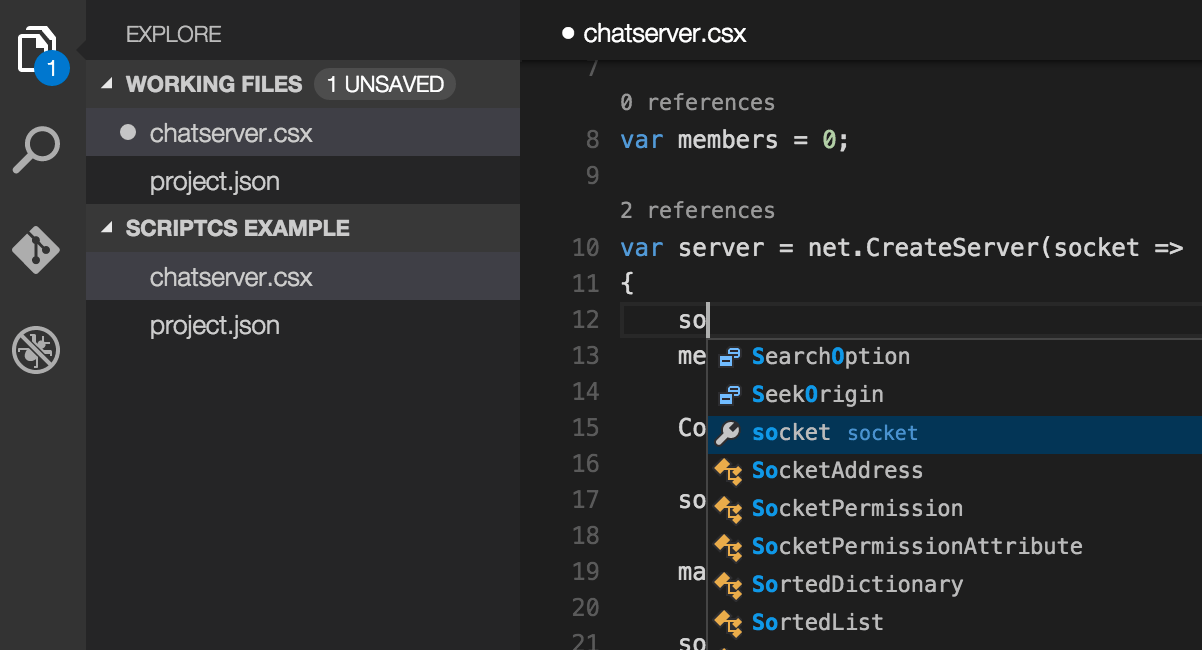
To get IntelliSense working with scriptcs using Visual Studio Code, you need to create and empty project.json file to the folder containing the scriptcs scripts. An empty .json-file means only the brackets:
{ }
Then the magic happens: IntelliSense, CodeLens, CTRL(CMD)+click go to definition and more:
10 / 10, would rewrite in scriptcs again.
Running ScriptCS from Visual Studio Code
By installing an extension, you can run the whole or parts of the scripts directly from the editor:
CTRL(CMD)+SHIFT+P Install Extensionext install scriptcsRunner
